When you find a pair of pants that you love but they are just a bit too loose around the waist, don’t despair. You don’t need to be a professional tailor to make your pants fit perfectly. With a few simple techniques and some basic sewing skills, you can easily make the waist of your pants smaller and achieve a custom fit. In this step-by-step guide, we’ll show you how to do just that.
What You’ll Need
Before you start altering your pants, gather the following materials:
- Pants: The pants you want to adjust.
- Measuring Tape: For taking accurate measurements.
- Sewing Pins: To hold fabric in place while sewing.
- Needle and Thread: In a matching color to your pants.
- Scissors: For cutting excess fabric.
Step 1: Try on the Pants
Put on the pants and assess how much you need to take in the waist. Make sure to wear the shoes and belt you plan to pair with the pants to ensure an accurate fit.
Step 2: Mark the New Waistline
Use a measuring tape to measure your natural waist, which is typically the narrowest part of your torso. Mark this measurement on the pants, evenly on both sides, with sewing pins or tailor’s chalk.
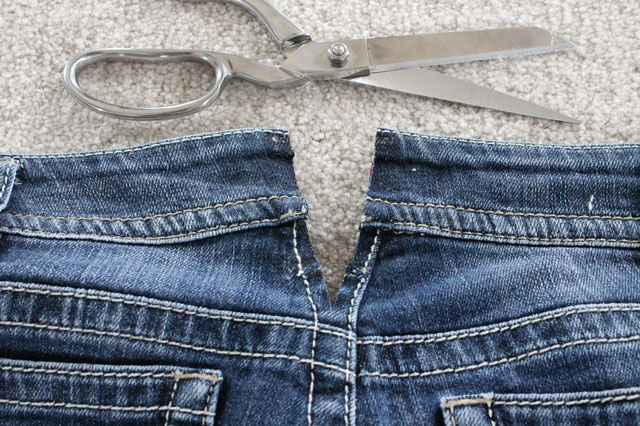
Step 3: Remove the Excess Fabric
Carefully remove the pants, and lay them flat on a table or work surface. From the waistline marking, measure out about half an inch (1.27 cm) and draw a new line parallel to the original waistline. This extra half-inch is for seam allowance.
Step 4: Pin and Sew
Fold the pants in half lengthwise, aligning the waistline and new seam line. Pin the fabric together along the new seam line, making sure the pins are parallel and evenly spaced. Then, sew along the new seam line using a straight stitch, removing the pins as you go.
Step 5: Try the Pants On Again
After sewing, try the pants on to ensure that the new waistline fits comfortably. If they’re still too loose, repeat the process, taking in more fabric if necessary.
Step 6: Trim Excess Fabric
Once you are satisfied with the fit, trim the excess fabric along the seam line, leaving a small seam allowance of about 1/4 inch (0.64 cm). Be careful not to cut too close to the seam, as this may cause the fabric to fray.
Step 7: Finish the Raw Edges
To prevent fraying, you can finish the raw edges of the seam using a zigzag stitch on a sewing machine or with a hand overcasting stitch.
Step 8: Iron the Waistband
Turn the waistband inside out and iron it flat to set the seam. This will make your alteration look more professional and help the waistband lie flat against your body.
Step 9: Secure the Button and Hook
If your pants have a button and hook closure, you may need to move them to adjust for the smaller waist. Simply sew them in their new positions.
Step 10: Test the Pants
Before wearing your newly altered pants out, give them a final try-on to ensure that they fit perfectly and that the button and hook closure align properly.
Congratulations, you’ve successfully made your pants’ waist smaller, giving them a tailored fit that flatters your body shape. With a little patience and some basic sewing skills, you can transform your wardrobe, making your favorite pants more stylish and comfortable.
Keep in mind that these alterations work best for pants with a simple waistband design. If your pants have a more complex waistband or extensive alterations are needed, you may want to consult a professional tailor. Otherwise, enjoy your well-fitted pants and the confidence that comes with wearing clothing that suits you perfectly.