If you’re looking for a unique and personal gift, why not make a keychain? You can turn just about anything into a keychain with a little bit of creativity. Here are a few ideas to get you started:
Use shrink plastic to create a miniature version of your favorite object. Shrink plastic is available at most craft stores and is easy to use – simply draw or trace your design onto the plastic, cut it out, and then bake it in the oven. Another option is to create a mold of your chosen object using air-dry clay. Once the clay is dry, you can cast it in resin or metal to create a durable keychain. If you’re feeling really ambitious, you could try 3D printing your design.
Can Cricut cut keychains?
If you own a Cricut cutting machine, you may be wondering if it can cut keychains. The answer is yes! Cricut machines are very versatile and can cut a variety of materials, including keychain blanks.
To make a custom keychain with your Cricut, start by finding a design or image that you want to use. Once you have your design, upload it to the Cricut Design Space software. From there, you can resize or edit your design as needed.
When you’re ready to cut, select the “keychain” setting on your machine. This will ensure that your cuts are the correct size and shape for a keychain blank. Then, just load your material and let the Cricut do its work!
If you’re looking for a creative and unique way to make keychains, then you may be wondering if Cricut can do the job. The answer is yes! Cricut machines are very versatile and can cut a variety of materials, including vinyl, paper, cardstock, and even thin metal sheets.
To get started, all you need is a Cricut machine, some keychain blanks (you can find these online or at your local craft store), and some adhesive vinyl or paper. Then just follow these simple steps:
Choose your design. You can either create your own design or use one of the many pre-made designs available online or in the Cricut Design Space library. Size your design. Keychain blanks are typically about 1 inch wide, so make sure your design is sized accordingly.
Can you make keychains with Cricut?
If you own a Cricut machine, or are thinking about purchasing one, you may be wondering if you can use it to make keychains. The answer is yes! In this blog post, we will show you how to make custom keychain using your Cricut machine. Making keychains with your Cricut is a great way to personalize your belongings and show off your creativity. Plus, they make great gifts for friends and family!
If you have a Cricut machine, the answer is most likely yes! You can make all sorts of keychains with a Cricut machine. You can make keychains out of vinyl, leather, and even metal.
If you want to make a vinyl keychain, all you need is some transfer tape, vinyl, and a keychain blank. First, cut your design out of vinyl using your Cricut machine. Then, use the transfer tape to apply the vinyl to the keychain blank. That’s it!
Making a leather keychain is a little bit more involved, but still totally doable with a Cricut. You’ll need some vegetable tanned leather, an adhesive backing, and either a rotary blade or a sharp knife. First, cut your design out of the leather using your Cricut machine (or knife).
Can you use Mod Podge to seal keychains?
Yes, you can use Mod Podge to seal keychains! This popular craft supply is perfect for protecting your keychain from dirt and moisture. Simply brush a thin layer of Mod Podge over the surface of the keychain, allow it to dry, and voila! Your keychain will be protected from the elements. you can use Mod Podge to seal keychains! This popular craft supply is perfect for sealing and protecting your keychain creations. Simply brush a layer of Mod Podge over the keychain and let it dry. Your keychain will be protected from scratches and wear and tear.
How do you make 3D printed keychains?
3D printed keychains are a fun and easy way to add a personal touch to your keys. Here’s how to make them:Choose a design for your keychain. There are many online sources for 3D printing files, or you can create your own using a 3D modeling program.
Print your keychain using an appropriate 3D printer filament. PLA or ABS plastic filaments work well for this purpose. Attach your keychain to your keys using a strong split ring or jump ring. Make sure the connection is secure so you don’t lose your keys!
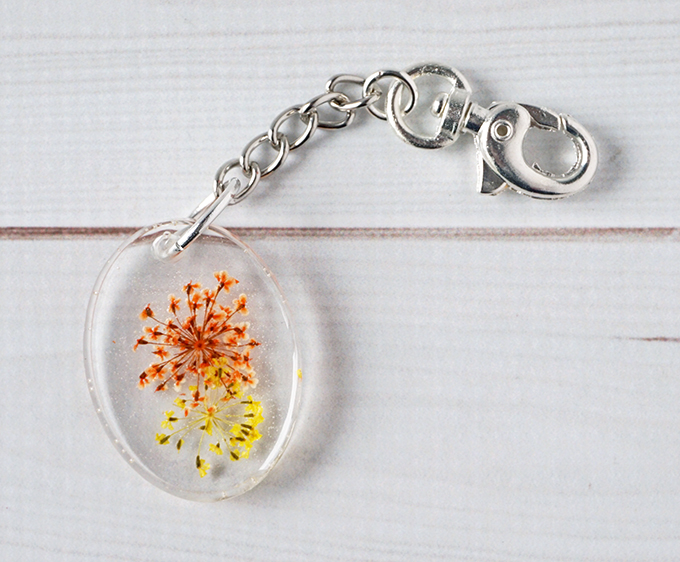
How do I make custom resin keychains?
Resin keychains are a great way to show off your personality and style. Plus, they make great gifts! Here’s how to make your own custom resin keychains:
Gather your supplies. You’ll need resin, molds, stir sticks, and gloves. Mix the resin according to the instructions on the package. Pour the resin into the molds. Let the resin set for at least 24 hours before removing it from the mold. Once it’s set, you can add any embellishments you like – glitter, paint, charms, etc. Attach a keyring to each keychain and you’re done!
Resin keychains are a great way to show off your style and personality. But how do you make them? Here’s a quick and easy guide to making custom resin keychains.
To start, you’ll need some supplies. You’ll need resin, silicone molds, glitter, and keychain hardware. You can find all of these supplies at your local craft store or online.
Once you have your supplies, it’s time to get started. First, mix the resin according to the manufacturer’s instructions. Once it’s mixed, pour it into the silicone molds. Add glitter if desired. Then let the resin set for the recommended amount of time.
Finally, add the keychain hardware and voila! You’ve made a custom resin keychain that shows off your unique style.
Final Thought:
There are many ways to turn something into a keychain. You can use keychain hardware, split rings, or lanyards to turn just about anything into a keychain. You can also get creative and use different materials to make keychains, like fabric or ribbon. Whatever you decide to use, keychains are a great way to keep your keys organized and stylish. Read more